Using a Raspberry Pi as a piano

Recently I posted about my successful attempt to get LinuxSampler running on the Raspberry Pi. I’ve taken this a bit further and produced a script that turns the Raspberry Pi into a fully fledged piano. Don’t expect miracles, the sample library I used is good quality so the RPi might choke on it every now and then with regard to disk IO. But it’s usable if you don’t play too many notes at once or make extensive use of a sustain pedal. I’ve tested the script with a Class 4 SD though so a faster SD card could improve stability.

Edit: finally got around buying a better SD card and the difference is huge! I bought a SanDisk Extreme Class 10 SD card and with this SD card I can run LinuxSampler at lower latencies and I can play more notes at once.

Before you can run the script on your Raspberry Pi you will need to tweak your Raspbian installation so you can do low latency audio. How to achieve this is all described in the Raspberry Pi wiki article I’ve put up on wiki.linuxaudio.org. After you’ve set up your RPi you will need to install JACK and LinuxSampler with sudo apt-get install jackd1 linuxsampler. Next step is to get the Salamander Grand Piano sample pack on your RPi:

cd
mkdir LinuxSampler
cd LinuxSampler
wget -c http://download.linuxaudio.org/lau/SalamanderGrandPianoV2
/SalamanderGrandPianoV2_44.1khz16bit.tar.bz2
wget -c http://dl.dropbox.com/u/16547648/sgp44.1khz_V2toV3.tar.bz2
tar jxvf SalamanderGrandPianoV2/SalamanderGrandPianoV2_44.1khz16bit.tar.bz2
tar jxvf sgp44.1khz_V2toV3.tar.bz2 -C SalamanderGrandPianoV2_44.1khz16bit
--strip-components=1

Please note that decompressing the tarballs on the RPi could take some time. Now that you’ve set up the Salamander Grand Piano sample library you can download the script and the LinuxSampler config file:

cd
mkdir bin
wget -c https://raw.github.com/AutoStatic/scripts/rpi/piano -O /home/pi/bin/piano
chmod +x bin/piano
wget -c https://raw.github.com/AutoStatic/configs/rpi/home/pi/LinuxSampler
/SalamanderGrandPianoV3.lscp -O
/home/pi/LinuxSampler/SalamanderGrandPianoV3.lscp

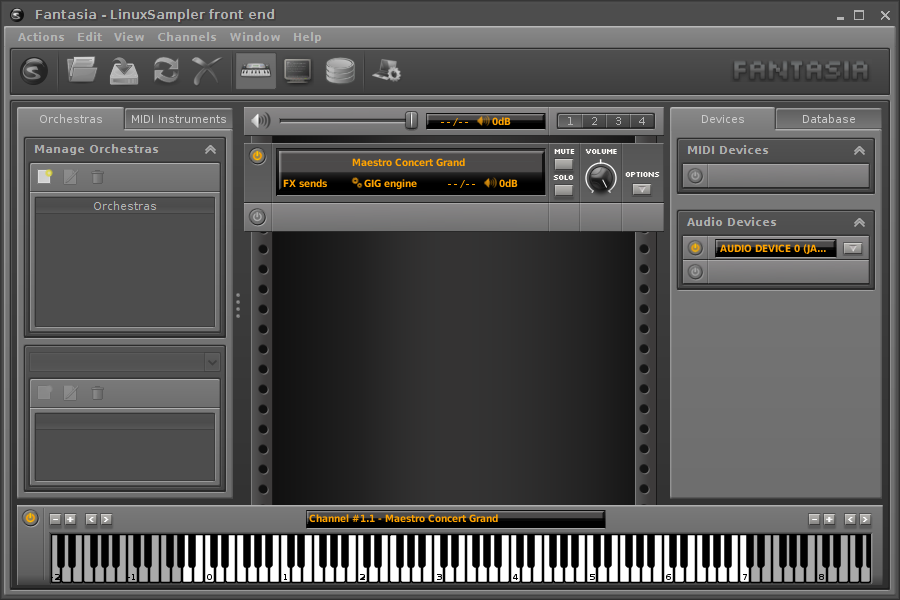
Almost there. We’ve installed the necessary software and downloaded the sample library, LinuxSampler config and piano script. Now we need to dot the i’s and cross the t’s because the script assumes some defaults that might be different in your setup. Let’s dissect the script:

#!/bin/bash

if ! pidof jackd &> /dev/null
then
  sudo killall ifplugd &> /dev/null
  sudo killall dhclient-bin &> /dev/null
  sudo service ntp stop &> /dev/null
  sudo service triggerhappy stop &> /dev/null
  sudo service ifplugd stop &> /dev/null
  sudo service dbus stop &> /dev/null
  sudo killall console-kit-daemon &> /dev/null
  sudo killall polkitd &> /dev/null
  killall gvfsd &> /dev/null
  killall dbus-daemon &> /dev/null
  killall dbus-launch &> /dev/null
  sudo mount -o remount,size=128M /dev/shm &> /dev/null
  echo -n performance
| sudo tee /sys/devices/system/cpu/cpu0/cpufreq/scaling_governor &> /dev/null
  if ip addr | grep wlan &> /dev/null
  then
    echo -n "1-1.1:1.0" | sudo tee /sys/bus/usb/drivers/smsc95xx/unbind &> /dev/null
  fi
  jackd -P84 -p128 -t2000 -d alsa -dhw:UA25 -p512 -n2 -r44100 -s -P -Xseq
&> /dev/null &
fi

This is the first section of the script. An if clause that checks if JACK is already running and if that’s not the case the system gets set up for low latency use, a simple check is done if there is an active WiFi adapter and if so the ethernet interface is disabled and then on the last line JACK is invoked. Notice the ALSA name used, hw:UA25, this could be different on your RPi, you can check with aplay -l.

jack_wait -w &> /dev/null

jack_wait is a simple app that does nothing else but checking if JACK is active, the -w option means to wait for JACK to become active.

if ! pidof linuxsampler &> /dev/null
then
  linuxsampler --instruments-db-location $HOME/LinuxSampler/instruments.db
&> /dev/null &
  sleep 5
netcat -q 3 localhost 8888
< $HOME/LinuxSampler/SalamanderGrandPianoV3.lscp &> /dev/null &
fi

This stanza checks if LinuxSampler is running, if not LinuxSampler is started and 5 seconds later the config file is pushed to the LinuxSampler backend with the help of netcat.

while [ "$STATUS" != "100" ]
do
  STATUS=$(echo "GET CHANNEL INFO 0" | netcat -q 3 localhost 8888
| grep INSTRUMENT_STATUS | cut -d " " -f 2 | tr -d 'rn')
done

A simple while loop that checks the load status of LinuxSampler. When the load status has reached 100% the script will move on.

jack_connect LinuxSampler:0 system:playback_1 &> /dev/null
jack_connect LinuxSampler:1 system:playback_2 &> /dev/null
#jack_connect alsa_pcm:MPK-mini/midi_capture_1 LinuxSampler:midi_in_0 &> /dev/null
jack_connect alsa_pcm:USB-Keystation-61es/midi_capture_1 LinuxSampler:midi_in_0
&> /dev/null

This part sets up the necessary JACK connections. The portnames of the MIDI devices can be different on your system, you can look them up with jack_lsp which will list all available JACK ports.

jack_midiseq Sequencer 176400 0 69 20000 22050 57 20000 44100 64 20000 66150 67 20000 &
sleep 4
jack_connect Sequencer:out LinuxSampler:midi_in_0
sleep 3.5
jack_disconnect Sequencer:out LinuxSampler:midi_in_0
killall jack_midiseq

This is the notification part of the script that will play four notes. It’s based on jack_midiseq, another JACK example tool that does nothing more but looping a sequence of notes. It’s an undocumented utility so I’ll explain how it is invoked:

jack_midiseq

<command> <JACK port name> <loop length> <start value> <MIDI note value> <length value>

Example:
jack_midiseq Sequencer 176400 0 69 20000 22050 57 20000 44100 64 20000 66150 67 20000

JACK port name: Sequencer
Loop length: 4 seconds at 44.1 KHz (176400/44100)
Start value of first note: 0
MIDI note value of first note: 69 (A4)
Length value: 20000 samples, so that's almost half a second
Start value of second note: 22050 (so half a second after the first note)
MIDI note value of second note: 57 (A3)
Length value: 20000 samples
Start value of third note: 44100 (so a second after the first note)
MIDI note value of second note: 64 (E4)
Length value: 20000 samples
Start value of third note: 66150 (so one second and a half after the first note)
MIDI note value of second note: 67 (G4)
Length value: 20000 samples

Now the script is finished, the last line calls exit with a status value of 0 which means the script was run successfully.

exit 0

After making the script executable with chmod +x ~/bin/piano and running it you can start playing piano with your Raspberry Pi! Again, bear in mind that the RPi is not made for this specific purpose so it could happen that audio starts to stutter every now and then, especially when you play busy parts or play more than 4 notes at once.


Using a Raspberry Pi as a piano: quick demo

Using a Raspberry Pi as a piano

Raspberry Jam Review

Last Thursday the first Dutch Raspberry Jam took place at the Ordina HQ in Nieuwegein. I offered to do a presentation slash demonstration about realtime audio and the the Raspberry Pi so I promised myself to be there at least an hour before the scheduled starting time of my demo. That way I could also join Gert van Loo‘s presentation. When I arrived at 19:15 there was no Gert van Loo though so that should’ve triggered some alarms. Also I didn’t look out for members of the organization as soon as I came in. Instead I chose to dot the i’s and cross the t’s with regards to my demo.

Wrong decision.

About half an hour later the event was closed.

WTF?

I approached the person who closed the event and introduced myself. He replied that they thought I wasn’t coming anymore. Apparently they misinterpreted my e-mail I sent earlier that day that I didn’t manage to produce something workable for the laser show guy. They took it for a cancellation. But immediately the event got kind of reopened and I set up my stuff. We had some audio issues but in the end everything went quite well actually. I showed off what is possible with a Raspberry Pi and realtime audio with the use of some of my favorite software. Guitarix featured of course. I grabbed my guitar, fired up guitarix on the RPi and played some stuff. Hooked up my MIDI foot controller and showed how to select different presets. I also demonstrated the use of the RPi as a piano with the help of LinuxSampler and the awesome Salamander Grand Piano samplepack and did some drumming by using drumkv1. Before the realtime audio demo I presented an overview of the Linux audio ecosystem and talked about the alternatives of how to get sound in and out of your Raspberry Pi. These alternatives are not bound to the onboard sound and USB, since recently it is also possible to hook up an external audio codec to the I2S bus of the Raspberry Pi. I got one in myself this week, a MikroElektronika Audio Codec PROTO board based on the WM8731 codec, so more on that soon. It’d be awesome if I can get that codec to work reliably at lower latencies.

So it all turned out well, I had a great time doing my presentation and judging by the interest shown by some attendants who came up to me after the presentation I hope I got some more people enthusiastic about doing realtime audio with the Raspberry Pi and Linux. So thanks Ordina for offering this opportunity and thanks everyone who stuck around!

Raspberry Jam Review

My First Little Grand Piano

LinuxSampler is zoals de naam al zegt een software sampler, maar wel een bijzondere want met LinuxSampler kun je zogenaamde Gigasampler/GigaStudio bestanden gebruiken, en daar zijn er aardig wat van, ook enkele van een hele goeie kwaliteit. Maar helaas, omdat LinuxSampler niet voldoet aan de Debian Free Software Guidelines wordt het niet meer gepackaged voor Ubuntu. Hoe het allemaal precies zit staat in een bugreport, het komt erop neer dat de makers van LinuxSampler een extra clausule aan de GPL licentie hebben toegevoegd (“commercial exception“) terwijl een GPL licentie kennelijk clausules uitsluit.

Op de LinuxSampler site zelf zijn wel pakketjes beschikbaar, echter alleen voor Ubuntu 8.04 32-bits en ja, dat gebruik ik al een tijdje niet meer. Gelukkig heeft iemand ze gepackaged voor 9.04 64-bits en in een PPA neergezet. Vanuit deze PPA zou je dus de benodigde pakketjes voor LinuxSampler kunnen downladen en installeren, ware het niet dat er in een tweetal pakketjes wat fouten zitten mbt. de afhankelijkheden van andere pakketjes. Ik heb die eruit gehaald en de gefikste pakketjes op mijn Downloads pagina neergezet. Je kunt de fouten er ook zelf uithalen of de pakketjes uit de PPA geforceerd installeren met het dpkg -i –force-depends pakketnaam commando. Maar downloaden en dubbelklikken werkt nou eenmaal wat makkelijker.

Download dus eerst de benodigde bestanden:

libgig6_3.3.0-1_amd64.deb
liblinuxsampler_1.0.0-5_amd64.deb
linuxsampler_1.0.0-5_amd64.deb

Installeer deze in bovenstaande volgorde door de bestanden dubbel te klikken en je wachtwoord in te geven. Nu heb je alleen de backend geïnstalleerd, we hebben ook nog een frontend nodig. Daar zijn er een aantal van (Qsampler, Jsampler, Fantasia) maar Fantasia wordt het meest gebruikt en bevat de minste bugs. Om Fantasia te kunnen gebruiken heb je wel Java nodig dus mocht je dat nog niet geïnstalleerd hebben dan moet je dat eerst doen (sun-java6-bin, sun-java6-jre en sun-java6-plugin). De Fantasia frontend kun je vinden op Sourceforge:

Fantasia-0.9.jar

Zelf heb ik in mijn home mapje een mapje LinuxSampler aangemaakt en hier Fantasia ingezet. Backend hebben we, frontend ook, nu nog een mooie samplepack:

Maestro Concert Grand v2

Maestro Concert Grand v2 is a big giga bank using 792 stereo samples of a concert piano, a Yamaha CF3 from the early 90s, It was chromatically sampled to maintain the tempered tuning. The samples were recorded with two Neumann KM84 microphones, disposed in X/Y, with 5 velocity layers, and weighs 932 MB ! The piano alone, without release samples, weighs 887 Mb and 440 samples. The release samples are 352 and weigh 45 MB. You can play with or without them.

Mocht je geen RAR bestanden kunnen openen installeer dan het pakketje unrar (dus niet unrar-free!). Nu kun je het samplepack uitpakken met de Archive Manager, ik heb dat zelf gedaan in het LinuxSampler folder in mijn home folder. Als het goed is heb je nu een mooi groot gig bestand in dat mapje staan. Ok, laten we een potje piano gaan spelen:

  • Start QjackCtl en start JACK.
  • Open een terminal en geef het volgende commando in: java -jar /pad/naar/Fantasia-0.9.jar
  • Mocht je een MIDI keyboard hebben wijs dan een MIDI kanaal toe aan LinuxSampler door in Fantasia aan de rechterkant onder ‘MIDI devices’ op het aan/uit knopje te drukken. De default instellingen zijn prima dus druk op ‘Create’.
  • Druk op de aan/uit knop onder ‘Audio Devices’, selecteer bij ‘Driver’ JACK en pas de samplerate aan naar de samplerate die je in QjackCtl hebt ingesteld en druk daarna op ‘Create’. In je ‘Connections’ venster van QjackCtl moet nu onder ‘Readable Clients’ ‘LinuxSampler’ verschijnen. Klik die aan zodat deze actief wordt, klik onder ‘Writable Clients’ op ‘system’ om deze actief te maken en klik vervolgens op het ‘Connect’ knopje linksonder.
  • In Fantasia moet je nu nog het gig bestand laden. Dit doe je door in het middelste stuk van het venster op het aan/uit knopje te drukken wat onder het luidspreker icoontje staat. Druk vervolgens op ‘Load Instrument…’ en blader bij ‘Select instrument from file’ naar je gig bestand. Bij ‘Instrument index’ kun je nu nog een bepaalde laag uit het gig bestand laden maar de laag die aangegeven wordt (0 – Maestro Concert Grand) voldoet om een lekker potje op de toetsen te rammen.
  • Klik op OK, het bestand wordt geladen en als je nu op wat rondklikt op het virtuele keyboard onderin het Fantasia venster zou je pianoklanken uit je speakertjes moeten horen komen.
  • Mocht je niks horen, het moet er zo uitzien als op het 


    Fantasia screenshot
    .

  • Leuk? Op de site van Sonart Audio staat ook nog een mooie samplepack.

Zelf heb ik op mijn bureaublad een snelkoppeling aangemaakt met een passend icoontje erbij die het java -jar /pad/naar/Fantasia-0.9.jar commando uitvoert. En het draait zelfs prima op mijn netbookje, wel grappig zo’n draagbare mini concert piano. Nu nog een mooi USB MIDI keyboard erbij met gewogen toetsen en een sustain pedaal…

My First Little Grand Piano